
Quick Start
Select a Node
Understand policy groups, latency tests, and automatic selection.
After importing a profile, open the Proxies page. It normally contains both individual nodes and policy groups created by the configuration provider.
A simple choice for first-time users
- Find the main policy group, often named Proxy, Node Selection, or Manual.
- Start with Auto Select or Fallback.
- If automatic selection performs poorly, test latency and choose a node manually.
- Keep Rule mode for normal use; you do not need to select a different node for every website.
Policy group names are controlled by the configuration provider, so your interface may not match the screenshots exactly. Look for the main group responsible for the default proxy route.
Test node latency
The latency test checks whether each node can connect and how quickly it responds.
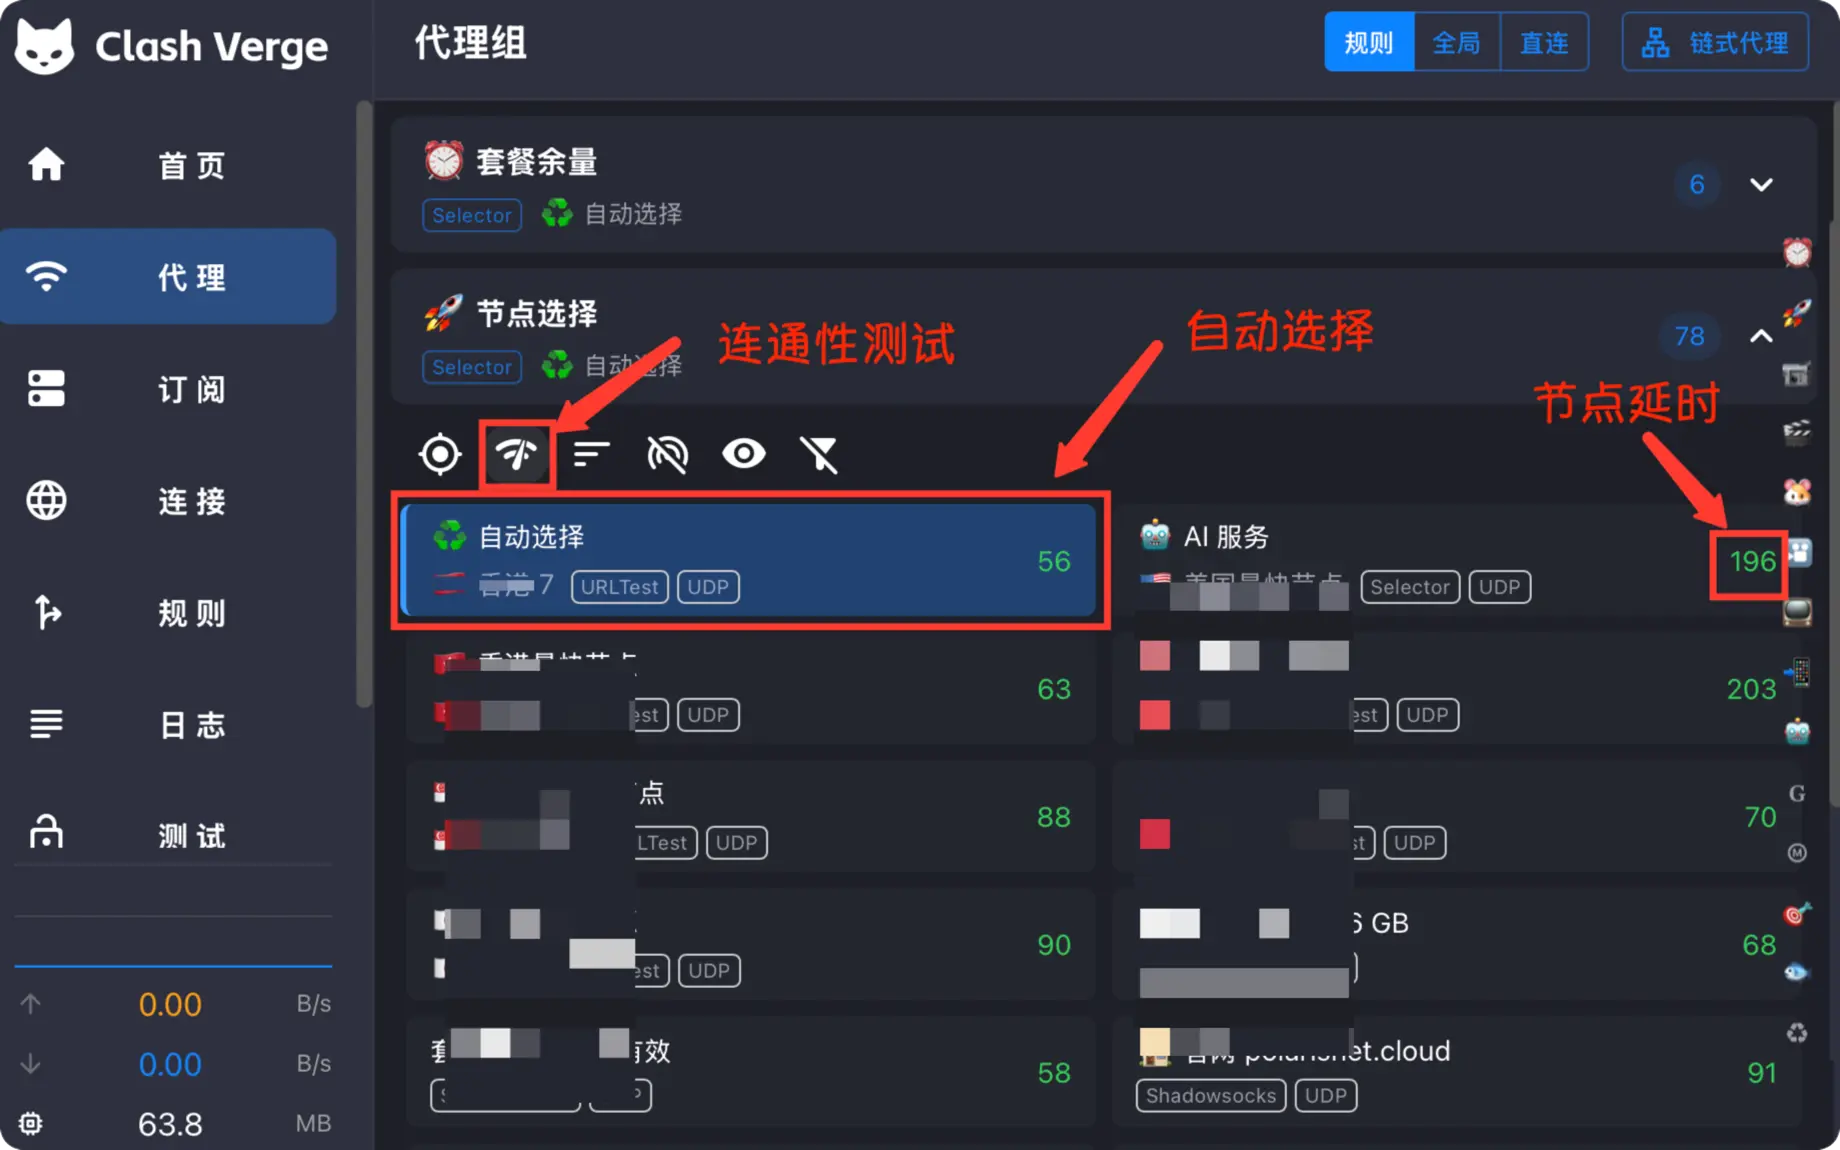
Treat the results as a guide rather than a guarantee:
- A lower number usually means a faster response.
Timeoutmeans the test could not complete at that moment; it does not always mean permanent failure.- Low latency does not guarantee high download speed. Bandwidth, congestion, and the destination still matter.
- Results may change when the test URL changes.
Automatic or manual selection
| Method | Best for | Behavior |
|---|---|---|
| Auto Select | Everyday browsing with minimal maintenance | Selects a node according to test results |
| Fallback | Users who prioritize stability | Switches to a backup when the current node fails |
| Manual | Users who need a specific region or route | Gives full control but requires manual maintenance |
Streaming and AI service tests
Some clients or configurations can test access to streaming, search, and AI services.
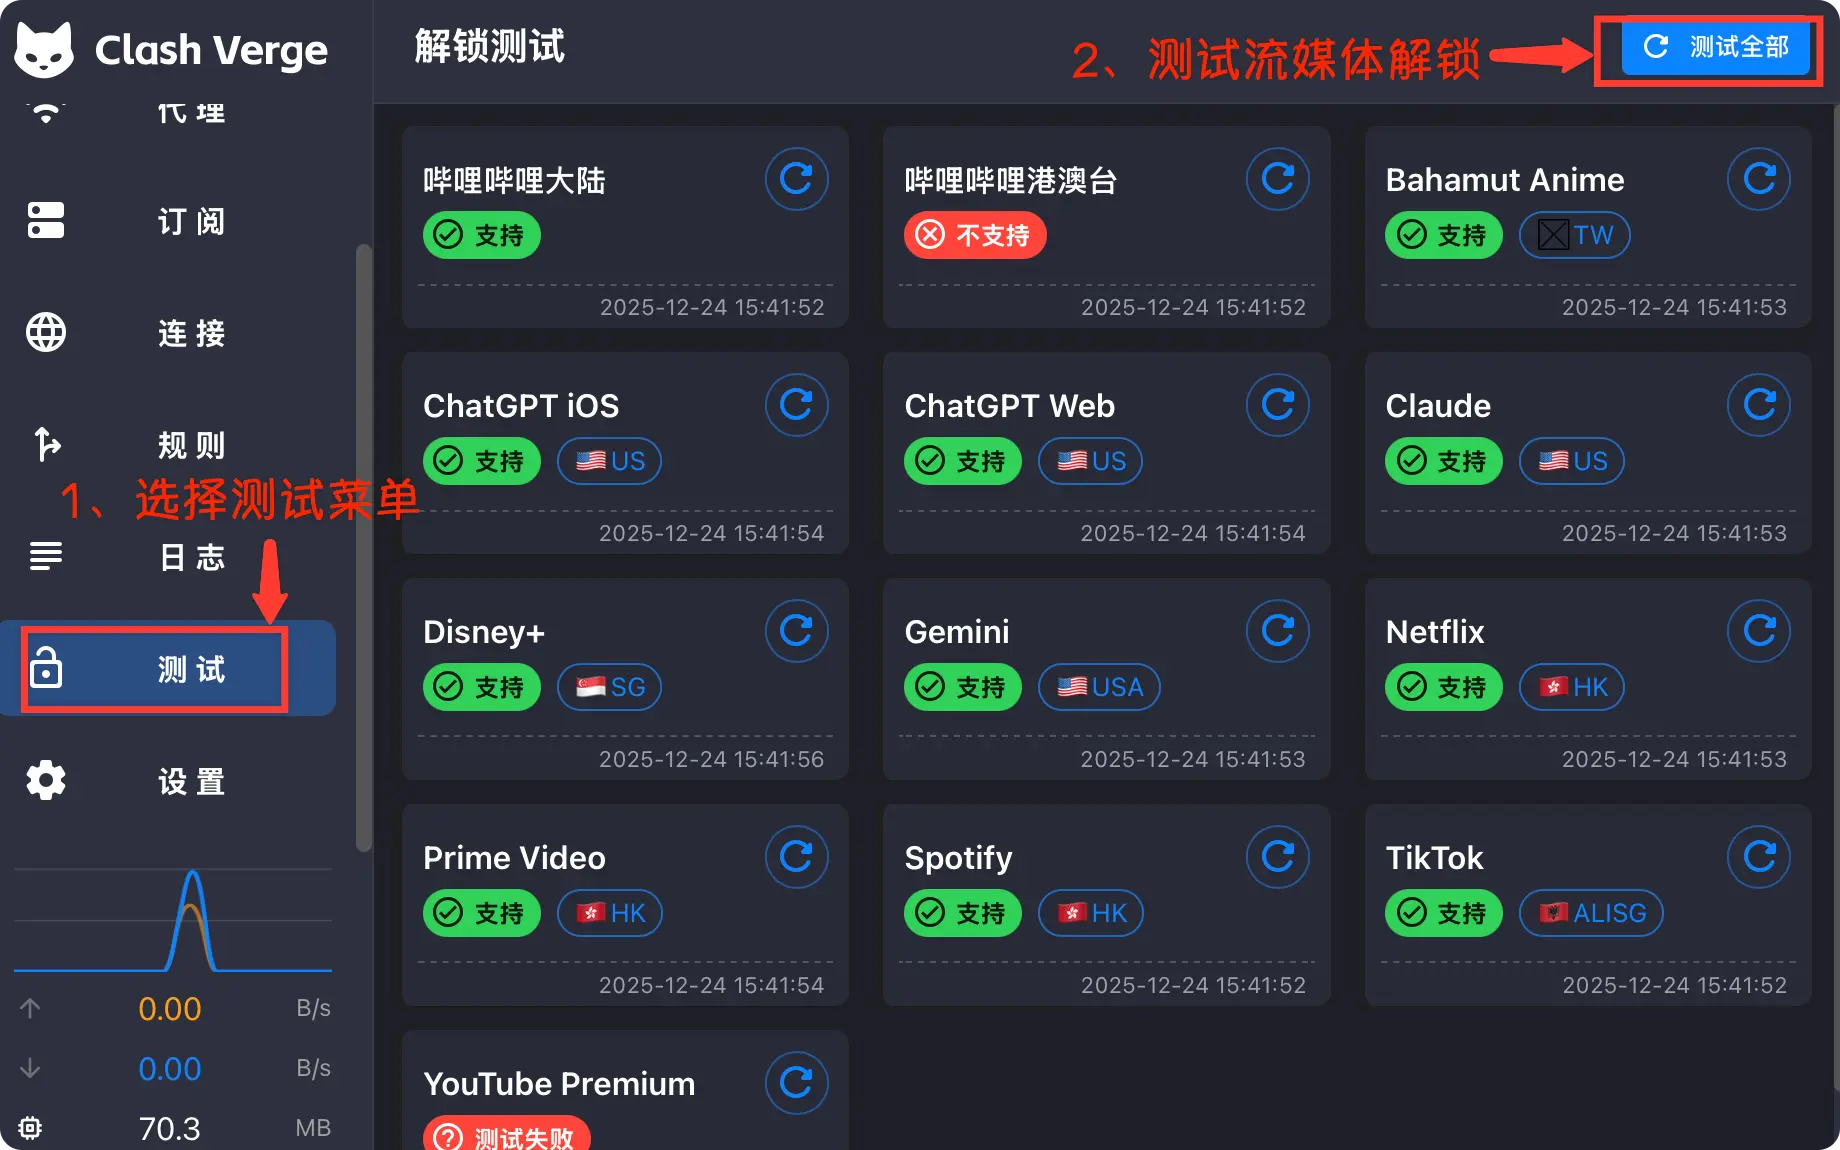
These results only describe the network at the time of testing. Account region, browser cache, DNS, exit location, and platform policies may also affect availability.
After selecting a node, enable the system proxy and verify the connection.